Part 1: Run a demo pipeline
In this first part of the Hello nf-core training course, we show you how to find and try out an nf-core pipeline, understand how the code is organized, and recognize how it differs from plain Nextflow code as shown in Hello Nextflow.
We are going to use a pipeline called nf-core/demo that is maintained by the nf-core project as part of its inventory of pipelines for demonstrating code structure and tool operations.
Make sure you are in the hello-nf-core/ directory as instructed in the Orientation.
1. Find and retrieve the nf-core/demo pipeline
Let's start by locating the nf-core/demo pipeline on the project website at nf-co.re, which centralizes all information such as: general documentation and help articles, documentation for each of the pipelines, blog posts, event announcements and so forth.
1.1. Find the pipeline on the website
In your web browser, go to https://nf-co.re/pipelines/ and type demo in the search bar.
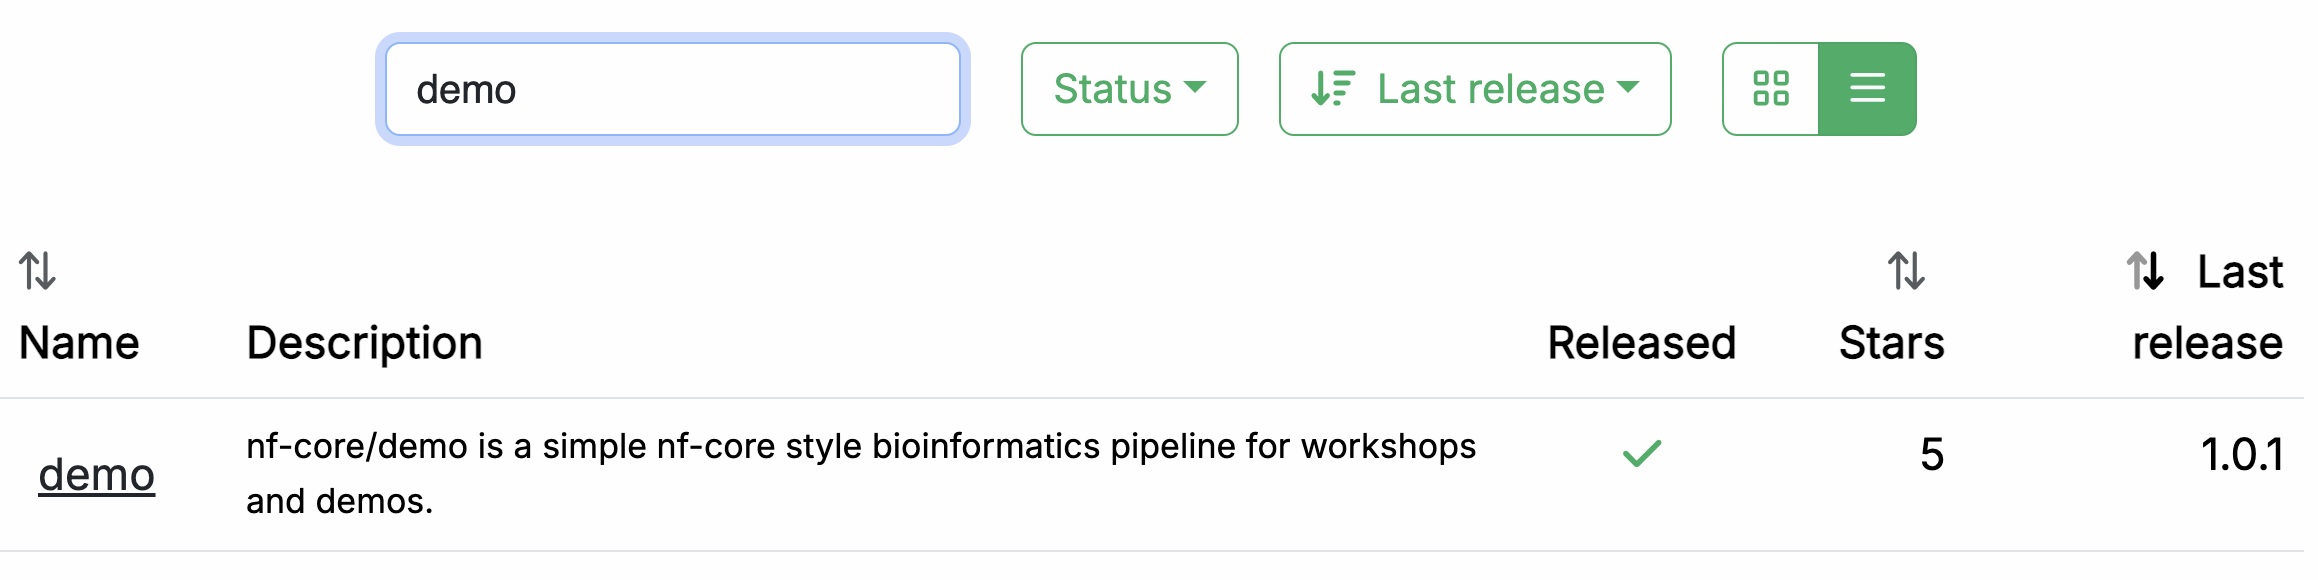
Click on the pipeline name, demo, to access the pipeline details page.
Each released pipeline has a dedicated page that includes the following documentation sections:
- Introduction: An introduction and overview of the pipeline
- Usage: Descriptions of how to execute the pipeline
- Parameters: Grouped pipeline parameters with descriptions
- Output: Descriptions and examples of the expected output files
- Results: Example output files generated from the full test dataset
- Releases & Statistics: Pipeline version history and statistics
Whenever you are considering adopting a new pipeline, you should read the pipeline documentation carefully first to understand what it does and how it should be configured before attempting to run it.
Have a look now and see if you can find out:
- which tools the pipeline will run (Check the tab:
Introduction) - which inputs and parameters the pipeline accepts or requires (Check the tab:
Parameters) - what are the outputs produced by the pipeline (Check the tab:
Output)
The Introduction tab provides an overview of the pipeline, including a visual representation (called a subway map) and a list of tools that are run as part of the pipeline.

- Read QC (FASTQC)
- Adapter and quality trimming (SEQTK_TRIM)
- Present QC for raw reads (MULTIQC)
The documentation also provides an example input file (see below) and an example command line.
nextflow run nf-core/demo \
 -profile <docker/singularity/.../institute> \
 --input samplesheet.csv \
 --outdir <OUTDIR>
You'll notice that the example command does NOT specify a workflow file, just the reference to the pipeline repository, nf-core/demo.
When invoked this way, Nextflow will assume that the code is organized in a certain way. Let's retrieve the code so we can examine this structure.
1.2. Retrieve the pipeline code
Once we've determined the pipeline appears to be suitable for our purposes, we're going to want to try it out. Fortunately Nextflow makes it easy to retrieve pipeline from correctly-formatted repositories without having to download anything manually.
Return to your terminal and run the following:
Nextflow will pull the pipeline code, meaning it will download the full repository to your local drive.
Checking nf-core/demo ...
 downloaded from https://github.com/nf-core/demo.git - revision: 04060b4644 [master]
To be clear, you can do this with any Nextflow pipeline that is appropriately set up in GitHub, not just nf-core pipelines. However nf-core is the largest open-source collection of Nextflow pipelines.
You can get Nextflow to give you a list of what pipelines you have retrieved in this way:
You'll notice that the files are not in your current work directory.
By default, they are saved to $NXF_HOME/assets.
Note
The full path may differ on your system if you're not using our training environment.
The location of the downloaded source code is intentionally 'out of the way' on the principle that these pipelines should be used more like libraries than code that you would directly interact with.
However, for the purposes of this training, we'd like to be able to poke around and see what's in there. So to make that easier, let's create a symbolic link to that location from our current working directory.
This creates a shortcut that makes it easier to explore the code we just downloaded.
Now we can more easily peek into the source code as needed.
But first, let's try running our first nf-core pipeline!
Takeaway
You now know how to find a pipeline via the nf-core website and retrieve a local copy of the source code.
What's next?
Learn how to try out an nf-core pipeline with minimal effort.
2. Try out the pipeline with its test profile
Conveniently, every nf-core pipeline comes with a test profile. This is a minimal set of configuration settings for the pipeline to run using a small test dataset hosted in the nf-core/test-datasets repository. It's a great way to quickly try out a pipeline at small scale.
2.1. Examine the test profile
It's good practice to check what a pipeline's test profile specifies before running it.
The test profile for nf-core/demo is shown below:
This tells us that the nf-core/demo test profile already specifies the input parameter, so you don't have to provide any input yourself.
However, the outdir parameter is not included in the test profile, so we will have to add it to the execution command using the --outdir flag.
2.2. Run the pipeline
Our examination of the test profile above told us what pipeline argument(s) we need to specify: just --outdir.
We're also going to specify -profile docker,test, which by nf-core convention enables the use of Docker containers, and of course, invokes the test profile.
Let's try it!
Here's the console output from the pipeline:
 N E X T F L O W   ~  version 24.10.0

Launching `https://github.com/nf-core/demo` [maniac_jones] DSL2 - revision: 04060b4644 [master]


------------------------------------------------------
                                        ,--./,-.
        ___     __   __   __   ___     /,-._.--~'
  |\ | |__  __ /  ` /  \ |__) |__         }  {
  | \| |       \__, \__/ |  \ |___     \`-._,-`-,
                                        `._,._,'
  nf-core/demo 1.0.1
------------------------------------------------------
Input/output options
  input                     : https://raw.githubusercontent.com/nf-core/test-datasets/viralrecon/samplesheet/samplesheet_test_illumina_amplicon.csv
  outdir                    : results

Institutional config options
  config_profile_name       : Test profile
  config_profile_description: Minimal test dataset to check pipeline function

Core Nextflow options
  revision                  : master
  runName                   : maniac_jones
  containerEngine           : docker
  launchDir                 : /workspaces/training/side-quests/nf-core/nf-core-demo
  workDir                   : /workspaces/training/side-quests/nf-core/nf-core-demo/work
  projectDir                : /workspaces/.nextflow/assets/nf-core/demo
  userName                  : gitpod
  profile                   : docker,test
  configFiles               :

!! Only displaying parameters that differ from the pipeline defaults !!
------------------------------------------------------* The pipeline
  https://doi.org/10.5281/zenodo.12192442

* The nf-core framework
    https://doi.org/10.1038/s41587-020-0439-x

* Software dependencies
    https://github.com/nf-core/demo/blob/master/CITATIONS.md

executor >  local (7)
[3c/a00024] NFC…_DEMO:DEMO:FASTQC (SAMPLE2_PE) | 3 of 3 ✔
[94/d1d602] NFC…O:DEMO:SEQTK_TRIM (SAMPLE2_PE) | 3 of 3 ✔
[ab/460670] NFCORE_DEMO:DEMO:MULTIQC           | 1 of 1 ✔
-[nf-core/demo] Pipeline completed successfully-
Completed at: 05-Mar-2025 09:46:21
Duration    : 1m 54s
CPU hours   : (a few seconds)
Succeeded   : 7
You see that there is more console output than when you run a basic Netxflow pipeline. There's a header that includes a summary of the pipeline's version, inputs and outputs, and a few elements of configuration.
Moving on to the execution output, let's have a look at the lines that tell us what processes were run:
[3c/a00024] NFC…_DEMO:DEMO:FASTQC (SAMPLE2_PE) | 3 of 3 ✔
[94/d1d602] NFC…O:DEMO:SEQTK_TRIM (SAMPLE2_PE) | 3 of 3 ✔
[ab/460670] NFCORE_DEMO:DEMO:MULTIQC           | 1 of 1 ✔
This tells us that three processes were run, corresponding to the three tools shown in the pipeline documentation page on the nf-core website: FASTQC, SEQTK_TRIM and MULTIQC.
Note
The full process names as shown here, such as NFCORE_DEMO:DEMO:MULTIQC, are longer than what you may have seen in the introductory Hello Nextflow material.
These includes the names of their parent workflows and reflect the modularity of the pipeline code.
We will go into more detail about that shortly.
2.3. Examine the pipeline's outputs
Finally, let's have a look at the demo-results directory produced by the pipeline.
demo-results/
├── fastqc
│   ├── SAMPLE1_PE
│   ├── SAMPLE2_PE
│   └── SAMPLE3_SE
├── fq
│   ├── SAMPLE1_PE
│   ├── SAMPLE2_PE
│   └── SAMPLE3_SE
├── multiqc
│   ├── multiqc_data
│   ├── multiqc_plots
│   └── multiqc_report.html
└── pipeline_info
    ├── execution_report_2025-03-05_09-44-26.html
    ├── execution_timeline_2025-03-05_09-44-26.html
    ├── execution_trace_2025-03-05_09-44-26.txt
    ├── nf_core_pipeline_software_mqc_versions.yml
    ├── params_2025-03-05_09-44-29.json
    └── pipeline_dag_2025-03-05_09-44-26.html
If you're curious about the specifics what that all means, check out the nf-core/demo pipeline documentation page.
At this stage, what's important to observe is that the results are organized by module, and there is additionally a directory called pipeline_info containing various timestamped reports about the pipeline execution.
This is standard for nf-core pipelines.
Congratulations! You have just run your first nf-core pipeline.
Takeaway
You know how to run an nf-core pipeline using its built-in test profile.
What's next?
Learn how the pipeline code is organized.
3. Examine the pipeline code structure
The nf-core project enforces strong guidelines for how pipelines are structured, and how the code is organized, configured and documented.
Let's have a look at how the pipeline code is organized in the nf-core/demo repository (using the pipelines symlink we created earlier).
You can either use tree or use the file explorer in your IDE.
pipelines/nf-core/demo
├── assets
├── CHANGELOG.md
├── CITATIONS.md
├── CODE_OF_CONDUCT.md
├── conf
├── docs
├── LICENSE
├── main.nf
├── modules
├── modules.json
├── nextflow_schema.json
├── nextflow.config
├── README.md
├── subworkflows
├── tower.yml
└── workflows
There's a lot going on in there, so we'll tackle this in stages. We're going to look at the following categories:
- Pipeline code components (
main.nf,workflows,subworkflows,modules) - Configuration, parameters and inputs
- Documentation and related assets
Let's start with the code proper, though note that for now, we're going to focus on how everything is organized, without looking at the actual code just yet.
3.1. Pipeline code components
The pipeline code organization follows a modular structure that is designed to maximize code reuse.
Note
We won't go over the actual code for how these modular components are connected, because there is some additional complexity associated with the use of subworkflows that can be confusing, and understanding that is not necessary at this stage of the training. For now, we're going to focus on the logic of this modular organization.
3.1.1. Overall organization and main.nf script
At the top level, there is the main.nf script, which is the entrypoint Nextflow starts from when we execute nextflow run nf-core/demo. That means when you run nextflow run nf-core/demo to run the pipeline, Nextflow automatically finds and executes the main.nf script, and everything else will flow from there.
In practice, the main.nf script calls the actual workflow of interest, stored inside the workflows folder, called demo.nf. It also calls a few 'housekeeping' subworkflows that we're going to ignore for now.
The demo.nf workflow itself calls out to various script components, namely, modules and subworkflows, stored in the corresponding modules and subworkflows folders.
- Module: A wrapper around a single process.
- Subworkflow: A mini workflow that calls two or more modules and is designed to be called by another workflow.
Here's an overview of the nested structure of a workflow composed of subworkflows and modules:
Not all workflows use subworkflows to organize their modules, but this is a very common pattern that makes it possible to reuse chunks of code across different pipelines in a way that is flexible while minimizing maintenance burden.
Within this structure, modules and subworkflows are further organized into local and nf-core folders.
The nf-core folder is for components that have come from the nf-core GitHub repository, while the local folder is for components that have been developed independently.
Usually these are operations that very specific to that pipeline.
Let's take a peek into those directories.
3.1.2. Modules
The modules are where the process code lives, as described in Part 4 of the Hello Nextflow training course.
In the nf-core project, modules are organized using a nested structure that refers to toolkit and tool names.
The module code file describing the process is always called main.nf, and is accompanied by tests and .yml files.
pipelines/nf-core/demo/modules
└── nf-core
    ├── fastqc
    │   ├── environment.yml
    │   ├── main.nf
    │   ├── meta.yml
    │   └── tests
    ├── multiqc
    │   ├── environment.yml
    │   ├── main.nf
    │   ├── meta.yml
    │   └── tests
    └── seqtk
        └── trim
            ├── environment.yml
            ├── main.nf
            ├── meta.yml
            └── tests
Here you see that the fastqc and multiqc modules sit at the top level within the nf-core modules, whereas the trim module sits under the toolkit that it belongs to, seqtk.
In this case there are no local modules.
3.1.3. Subworkflows
As noted above, subworkflows function as wrappers that call two or more modules.
In an nf-core pipeline, the subworkflows are divided into local and nf-core directories, and each subworkflow has its own nested directory structure with its own main.nf script.
pipelines/nf-core/demo/subworkflows
├── local
│   └── utils_nfcore_demo_pipeline
│       └── main.nf
└── nf-core
    ├── utils_nextflow_pipeline
    │   ├── main.nf
    │   ├── meta.yml
    │   └── tests
    ├── utils_nfcore_pipeline
    │   ├── main.nf
    │   ├── meta.yml
    │   └── tests
    └── utils_nfschema_plugin
        ├── main.nf
        ├── meta.yml
        └── tests
In the case of the nf-core/demo pipeline, the subworkflows involved are all 'utility' or housekeeping subworkflows, as denoted by the utils_ prefix in their names.
These subworkflows are what produces the fancy nf-core header in the console output, among other accessory functions.
Other pipelines may also use subworkflows as part of the main workflow of interest.
Note
If you would like to learn how to compose workflows with subworkflows, see the Workflows of Workflows Side Quest (also known as 'the WoW side quest').
3.2. Configuration
The nf-core project applies guidelines for pipeline configuration that aim to build on Nextflow's flexible customization options in a way that provides greater consistency and maintainability across pipelines.
The central configuration file nextflow.config is used to set default values for parameters and other configuration options. The majority of these configuration options are applied by default while others (e.g., software dependency profiles) are included as optional profiles.
There are several additional configuration files that are stored in the conf folder and which can be added to the configuration by default or optionally as profiles:
base.config: A 'blank slate' config file, appropriate for general use on most high-performance computing. environments. This defines broad bins of resource usage, for example, which are convenient to apply to modules.modules.config: Additional module directives and arguments.test.config: A profile to run the pipeline with minimal test data, which we used when we ran the demo pipeline in the previous section (code shown there).test_full.config: A profile to run the pipeline with a full-sized test dataset.
3.3. Documentation and related assets
At the top level, you can find a README file with summary information, as well as accessory files that summarize project information such as licensing, contribution guidelines, citation and code of conduct.
Detailed pipeline documentation is located in the docs directory.
This content is used to generate the web pages on the nf-core website.
In addition to these human-readable documents, there are two JSON files that provide useful machine-readable information describing parameters and input requirements, nextflow_schema.json and assets/schema_input.json.
The nextflow_schema.json is a file used to store information about the pipeline parameters including type, description and help text in a machine readable format.
The schema is used for various purposes, including automated parameter validation, help text generation, and interactive parameter form rendering in UI interfaces.
The schema_input.json is a file used to define the input samplesheet structure.
Each column can have a type, pattern, description and help text in a machine readable format.
The schema is used for various purposes, including automated validation, and providing helpful error messages.
An example samplesheet is provided under the assets directory:
| assets/samplesheet.csv | |
|---|---|
Note
The paths in this example samplesheet are not real.
For paths to real data files, you should look in the test profiles, which link to data in the nf-core/test-datasets repository.
In general, it's considered good practice to link out to example data rather than include it in the pipeline code repository, unless the example data is of trivial size (as is the case for the greetings.csv in the Hello Nextflow training series).
Takeaway
You know what are the main components of an nf-core pipeline and how the code is organized, what are the main elements of configuration, and what are some additional sources of information that can be useful.
What's next?
Take a break! That was a lot. When you're feeling refreshed and ready, move on to the next section to apply what you've learned to write an nf-core compatible pipeline.